Introduction
Windows
Deployment Services is a technology used to deploy Windows operating
systems through a network. It is one the most convenient way to install
an operating system in a corporate environment. The RIS (Remote
Installation Service) is the forerunner of Windows deployment service
(WDS ). WDS can be used to deploy Windows XP, Windows Vista, Windows
7 and Windows server 2008 operating system. There are two
installation methods in WDS
- Attended installation - Installation that is performed by user interaction during its progress.
- Unattended installation - Installation that is performed without user interaction during its progress or with no user present at all.
In this tutorial we are going to see:
1. Step-by-step
configuration of Windows Deployment Service in Server 2008 R2
2. Creating
an Unattended XML file using AIK
3.Creating a Customized Image of Windows 7
3.Creating a Customized Image of Windows 7
Task 1 : Step-by-step configuration of Windows Deployment Service in Server 2008R2
Open the server
manager in Server2008 R2 and click Roles > Add Roles.
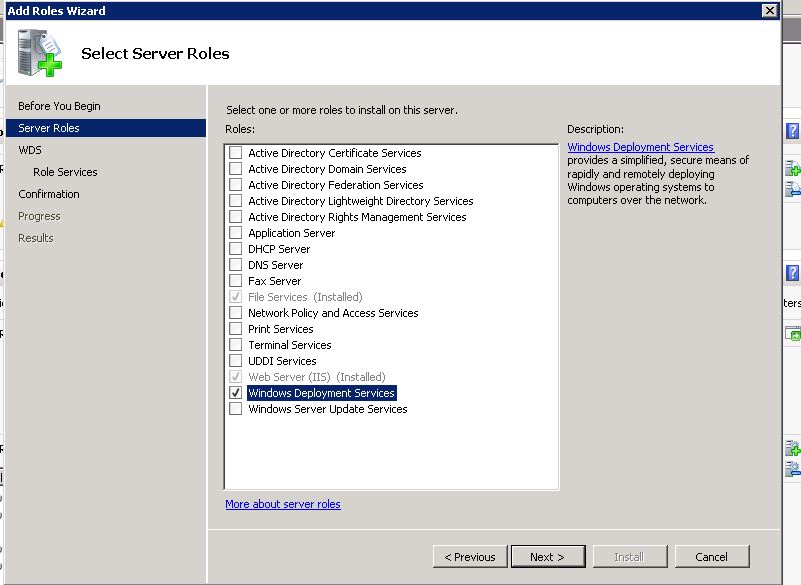
1. Select the
Windows Deployment Service check box and click next.
2. You will get
a WDS overview screen, read it out and click next.

3. You will be
prompted to select the role services. As of now select both
deployment server and Transport server. I will explain the
functionality of the transport server latter. Click next.

4. You will get
a confirmation screen, click Install.

5. The WDS
installation will finish within a few minutes.

6. You will get
a confirmation page after the successful installation. Click close.

Now you can see the WDS management console in All programs > Administrative tools. Open up WDS management console.
7. When you open
the console you will be notified that the WDS Server is not yet
configured. Now we have to configure the server by going to the
Action tab>Configure server.

8. You will get
a welcome page, verify the prerequisites and click next.

9. Choose a
folder to store all the configuration details of WDS. It will be much
better if you can choose a drive other than the system volume.


10. WDS server
configuration is completed. Click finish.

11.Now you can
upload install image and boot images for remote deployment.

In our scenario
I am going to add an image of windows 7. For this we need an
installation disc of Windows 7. Insert the disc in your PC, explore
it and search for the Source folder. Inside the Source folder you
will see 'boot.wim' and 'install.wim' file. Copy these two files and
paste it in a local drive of your WDS server.
12. Right click
the 'Boot Images' tab and click 'Add Boot Image' > Browse for the
'boot.wim' file which is stored in your local drive and click next.

13.You can give
the name and description of the image you are uploading.

14. The boot
image will be displayed as below after the upload.

15. Add Install
image by right clicking 'Install Images' and 'Add Install Image'.
Browse for the 'install.wim' file and upload it to the server. After
you upload an image you can see the image library as like below:

16. The WDS
server configuration is almost completed with the above step. Now we
can fine tune the WDS services by right clicking the Server and going
to the 'Properties' tab. Below you can
see so many options in the server properties. But I am going to
explain only about the
unattended installation as it is one of the important feature of WDS

Unattended
Installation
Unattended installation will help you to install the OS
without any human intervention. The installation setup will run
automatically by reffering the answer file that you have created.
1. Switch on to the client tab and tick the check box
“Enable unattended installation” and browse for the unattended xml
file. The unattended answer file should be saved in your server's
'LocalDrive:\RemoteInstall\WdsClientUnattend' folder, which is
created automatically once you install the WDS on your server 2008. I
will explain how to create an unattended xml file later in this
tutorial.

2. Then go the image properties by right clicking the
install image and tick the check box as shown below. Here you need to
select a unattended.xml file which is stored on your local drive on
your server.

Task 2
: Creating an Unattended XML file
To create an unattended xml file you can use the Windows AIK Tool kit or you can write your own xml file. Here I am using the
Windows AIK Toolkit to accomplish the task.

Download the Windows Automated Installation Kit from
Microsoft website (http://www.microsoft.com/en-us/download/details.aspx?id=5753) and install it on your computer. You can download
the software for free of cost from the Microsoft website.
After the installation you can see the 'Windows System
Image Manager' in All programs > Microsoft windows AIK >
Windows System Image Manager.
Open it and click 'Create an answer file' You will be
prompted to select a Windows 7 image ('install.wim' file) and follow
the instructions. Refer the screen shot below.

After the image upload you will get a screen as below,
where you can edit all the settings that you wanted to add to your
answer file.

In our scenario I am adding some settings like disk
partition, automatically join the domain, IE home page etc in the answer file. Refer the
following screen shots where you can find some of those settings.


Once you finish adding all required settings in your answer file go to 'File > Save Answer file as' and save it with the name 'Autounattended.xml' and upload it to your WDS server. Below you can find the screenshot of an answer file that I have created. Also you can the check the following links for sample answer files: http://www.mockbox.net/windows-7-tips/149-windows-7-autounattend-example
http://www.networknet.nl/apps/wp/archives/1402

Now you can boot the computer from the network and test
the Windows Deployment Services. While you boot a computer from the
network make sure that the PXE boot & LAN boot is enabled in the
BIOS. If you enable unattended installation then the OS installation will
start automatically with the PXE boot.
Task 3. Creating a Customized Image of Windows 7
Task 3. Creating a Customized Image of Windows 7
While you install an operating system using WDS it is better to deploy a customized image of your OS. That will reduce the pain of installing the necessary softwares in each system after deployment.Here I am going to explain the steps to create a customized image of windows 7 using sysprep and imageX tool.
For creating the customized image we need to have the below tools with us:
>Windows
AIK
>Technician
computer
>Reference
Computer (Which is installed with all the necessary softwares)
1. Set up a Windows PE build environment
- Install AIK on the technician computer
- On the technician computer, click start, point to all programs,point to windows AIK, right-click Deployment Tools Command Prompt, and then select run as administrator.Then type the command as follows: copype.cmd x86 d:\winpe_x86
- Copy the base image (Winpe.wim) to the \Winpe_x8r\ISO\sources folder and rename the file to Boot.wim. Type the command as follows:copy D:\winpe_x86\winpe.wim D:\winpe_x86\ISO\sources\boot.wim
- Add imagex.exe to the winpe_x86\iso folder. Type the command as follows:copy "C:\Program Files\Windows AIK\Tools\x86\imagex.exe" D:\winpe_x86\iso\
- Create an ISO Image of Install.wim File : oscdimg -n -bD:\winpe_x86\etfsboot.com D:\winpe_x86\ISO D:\winpe_x86\winpe_x86.iso
- Burn the ISO image to a disc and label it as Windows PE boot image.
2. Create the Image of the reference computer:
- Now you have to go to the reference computer which is installed with all the necessary applications and run the sysprep. You can open up a command prompt and type the command as below: c:\windows\system32\sysprep\sysprep.exe /oobe /generalize /shutdown
- After running the command the computer will shutdown automatically.
- Now boot the reference computer from the Windows PE boot image disc that we have already created.
- As as the computer boots you will get a command prompt. Move to the drive where the disc got mounted. Type the command as follows : imagex /capture C: C:\Install.wim“Win 7 x86 Proffessional” /VERIFY
- Reboot the computer and check the C drive where you will find the Install.wim file.This is the image of your reference computer. Upload the Image to the WDS server and deploy.
I strongly recommend you to check the logs by going to the Event Viewer before you begin troubleshooting.
You can visit 1.) http://technet.microsoft.com/en-us/library/cc771269(v=ws.10).aspx
2.) http://trycatch.be/blogs/roggenk/archive/2010/07/15/wds-troubleshooting-part-1.aspx for more information about troubleshooting.
2.) http://trycatch.be/blogs/roggenk/archive/2010/07/15/wds-troubleshooting-part-1.aspx for more information about troubleshooting.
Thanks for sharing these helpful chapter with us regarding windows development. I got a lot of knowledge from this article. Keep posting like this useful information
ReplyDelete